
has some really great projects in it. I wanted the technique to be within my skill set, and when I read the instructions through again, I got it all worked out. So here's the secret to this project:
First, I realized that I needed to leave the border all around the "stained glass" cut-outs, which made the "leading" fabric more stable and easier to work with:

So the trick to doing the applique on this is to work from the back side. I pulled off the paper from the fusing medium, exposing the sticky side and laid it flat on my ironing board with a pressing sheet beneath. The pressing sheet will protect the ironing board, but it also allows me to move the piece around without disturbing my work.

Also, you'll want some sort of mini-iron for this task. This is actually the first time I've found a use for this tool beyond sticking hot fix crystals.

The instructions further suggested that I start in one corner and work outward and upward (or downward, depending on where you start) from there. When I drew the templates onto my freezer paper, I drew both the inner and outer borders of each piece.

First, I laid it in its spot to check for fit, then trimmed it so that it only covered half of the fusible "leading". I'll need the other half to fuse the adjacent pieces.

Then, I peeled off the freezer paper, and then carefully fused it, being cautious not to get the iron over onto the fusible.

Then, I flipped it over to see how it was looking. So far, so good. Now about those little black "whiskers".

I didn't do this for every piece until I'd finished the whole thing, but for purposes of this demonstration, I'll tell you that I used my curved-tip applique scissors to trim those away.

Then I went back to my pattern and crossed off each completed piece as I went, just to save myself from getting confused...which is very easy at this stage of the game.

The instructions suggested making all the templates at the same time, but I did mine one at a time.
While the first piece needed to be trimmed to leave room on the fusible for the adjacent pieces, it is okay for the adjacent pieces to overlap the first. In fact, the instructions claim that a little bit of overlap will make the piece stronger.

Still, you'll need to trim them away to make way for the piece that is adjacent to them, as I've done in the image above. The dark blue and the green overlap the lighter blue, but they are trimmed to reveal the fusible on the "leading" for the pieces that will come next.
When I had the piece halfway done, it looked like the image below.

You want to try to cover the fusible completely so that when you flip it over, there isn't exposed fusing medium that will get stuck to the surfaces below. I was using a pressing sheet, and so it wasn't crucial, but I paid attention as I went just to be overly cautious. Then I flipped the piece over and used my regular iron to give it a good pressing and make sure everything I'd done to that point was fused down tight.

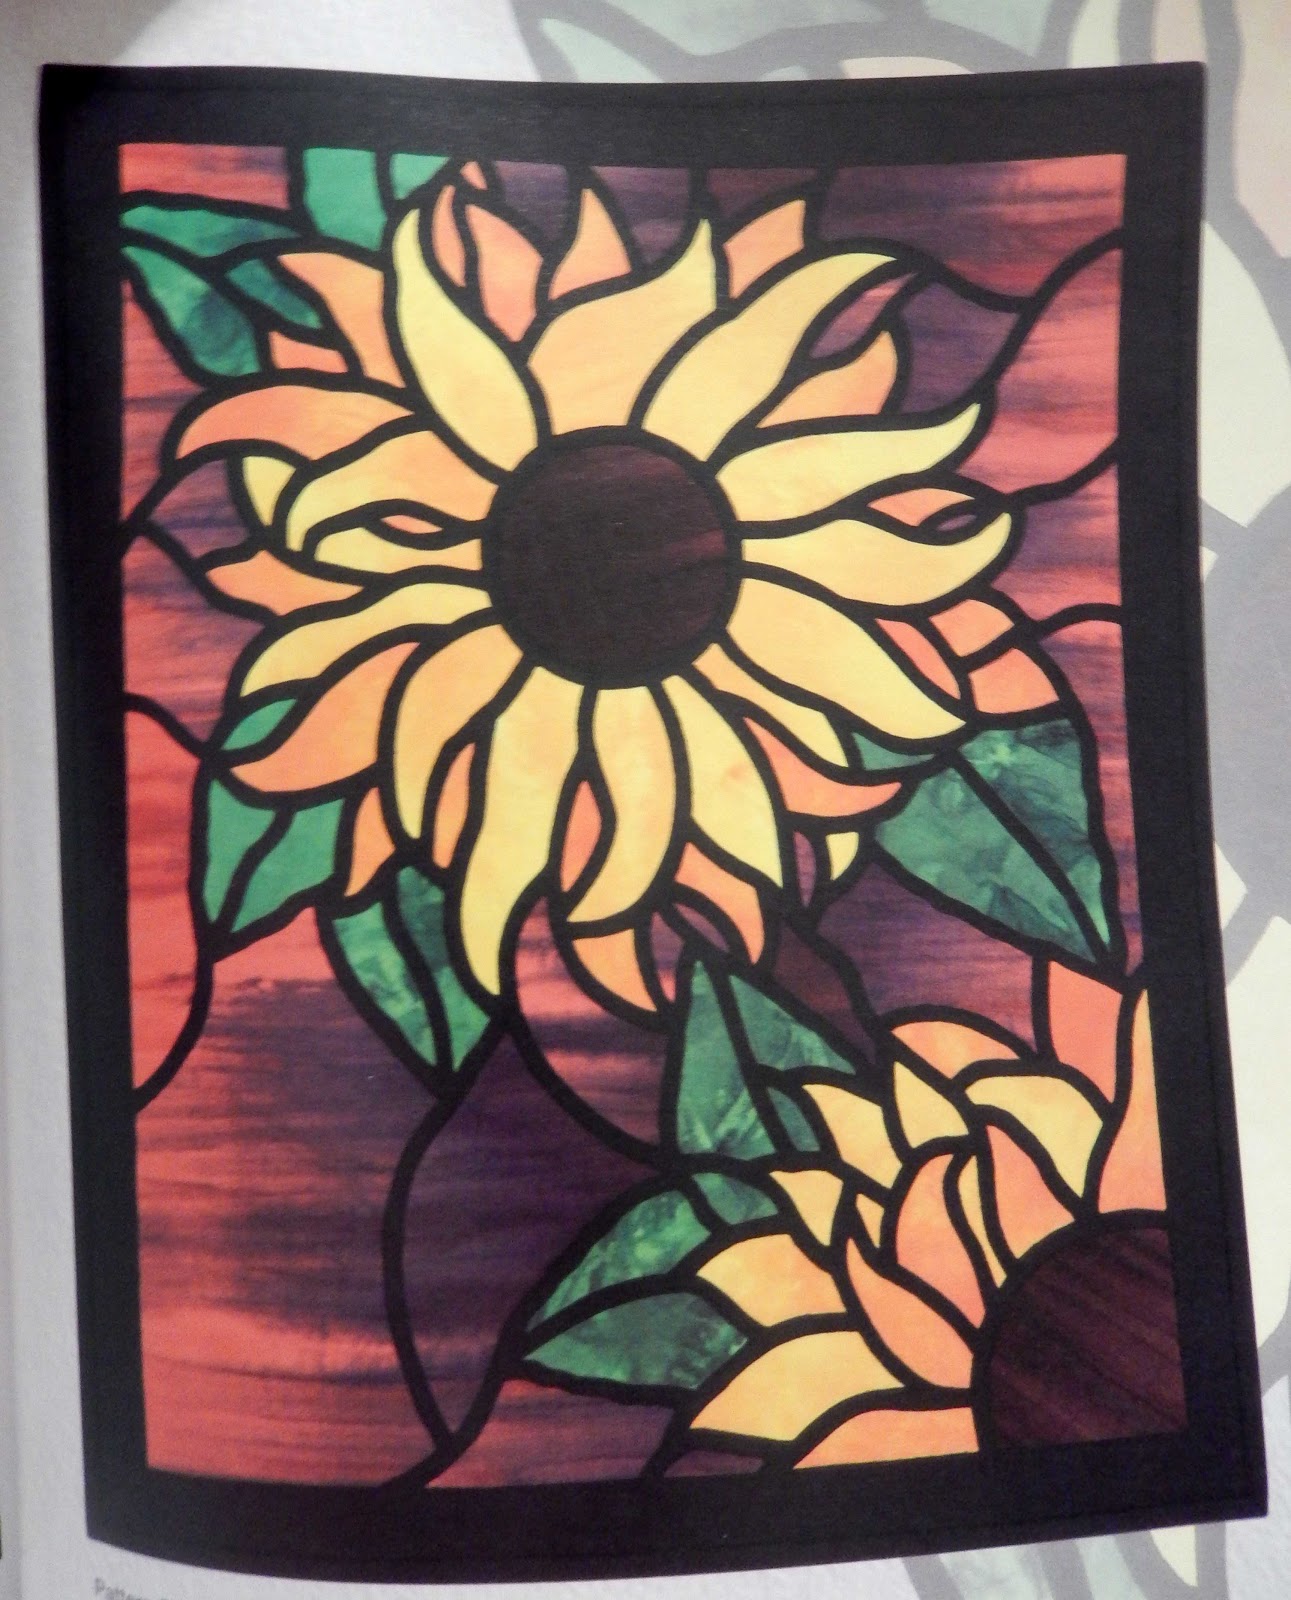
And then I just continued on with the rest of the pieces to complete the upper half and the entire piece. When I was finished, it looked like this:

Cool, huh? It took me about three hours to get this far, and it was sooooooo much easier than what I was trying to do yesterday. At this point, I trimmed off the other "whiskers" that I could see, and from here I was ready to finish it in whatever way I choose.
I'm so happy that this has worked now that I've done it a different way. I really like the looks of this, and the book has some great projects in it. I bought the book for this cat project in the image below:

But there are some other projects that I really like. This one, for instance:

And this one:
There are still others in the book that I like too, but I think you get the idea. I will definitely be making more projects from this book.
So I decided to finish my piece off with a narrow border:

Now I'm in the process of top-stitching with a straight stitch right along both edges of the "leading" fabric. I have the quilt sandwiched, and so the top-stitching also serves as the quilting. I used that same dark blue for the back. Here's how it looks so far:

I still have quite a bit to do, but I should be able to finish the quilting tomorrow. Then I'll bind it in black, and it will be finished. I've decided to name this quilt, "Spring Fever".
It started out as a near-disaster, but it's finished up as a definite success. Can't ask for a better day of sewing than that.
20 comments:
Oh that is beautiful! If you ever need to make one for no reason I could be convinced to take it off your hands. LOL It looked like it was really hard to do but with your photos and commentary, it's doable.
Congrats!
Glad you continued on as this is so lovely.
I made something similar once, but with a single piece of backing fabric:
http://flic.kr/p/9vLAB7
I also tried using fusible bias tape to do a stained glass style quilt, and all those ends were a pain!
Yours is turning out much nicer!
Congratulations on overcoming that difficult phase of this project! It is going to be beautiful.
Honestly Barbara, you have the patience of Job!! I have never done stainglass like this before and I take my hat off to you for not only tackling it but for mastering it as well!! Well done you!
Cath @
ps....I have been reading your blog lately but mostly from my iPad and I have difficulty with commenting thus.
The second time was definitely the charm. It turned out beautifully.
A great success. It's awesome
I'm so glad you worked it out, the others are gorgeous too, can't wait to see the one with the cat in the middle.
The daffodil looks great! I wish spring would hurry up and finally arrive here. (it's supposed to snow, again, sometime over the next few days).
I love love love the cat project! It is gorgeous!
Ah, sweet success!! Sometimes I confuse myself so much it's a wonder I get out of bed in the morning and then I go back and start over and it all seems so simple. Good thing I'm not a brain surgeon!
It's gorgeous!This was soooo worth doing over the second time, with fresh eyes !
This is a lovely book... I have always wondered about the technique. Thanks for taking us step by step and inspiring me.
Susie
I read both posts today and thought about the book of stained glass patterns I have from back-in-the-day of my stained glass phase. I think this technique would work for those. Your project looks wonderful. I'm inspired.
B*E*A*U*T*I*F*U*L!!!
A great reward for all of your hard work!!!
I might even be inspired enough to sew something tomorrow. (Working today & tonight I have a transcription to finish) Then I'll have a bit more than a pile of chosen fabrics to photograph for my NewFO post. ;)
Awesome! I knew you would figure it out! I love the cat!
Fantastic! I'm so glad you tried it again. The other ones look exciting and I can't wait to see you do them!
I had a friend request me to make her something, and, this will help me to make it, I think. I've stalled, since I couldn't figure out how to do what she wanted. Thanks for the ideas. I'll have to get me one of those little irons now.
Hey Barbara! Thank you for sharing this project, I love daffodils as well, and stained glass is one of my favorite pieces of artwork to admire, so the combination just makes my day! I was thinking, you said you held onto the black pieces you had cut out initially, could you place them on a solid piece of colored fabric and to make a reversed stained glass effect? I'm very excited about this process, I shall have to pick up the book! Again, thank you for sharing!
~Brandy
pamperedpettit.blogspot.com
it looks great! Is the black outline just black fabric cut out? I have a mini iron and it's invaluable. I use it when I'm doing paper piecing as I can have it next to me rather than walking to the ironing board every few minutes, it's also a lot easier than a big iron for pressing seams open.
This is so pretty. I'm amazed that fabric alone can create such a beautiful stained glass effect.
That is a really well done tutorial. I love the look of the stained glass! Can't wait to see your progress on the mountains!
Post a Comment