It's my first December finish. Is it cheating if I started while the calendar still said November? This was a fun project made from a kit I purchased from Bird Brain Designs.
That one isn't mine...that's the one pictured on the website. Once started, I worked on it almost nonstop for three full days. It was a new product and a new technique for me, and so I read the instructions all the way through before starting. (That's very uncharacteristic of me. I'm more of the "uh-oh" mentality...mess up, then read the instructions.)
So this was the new-to-me product. It amounts to a gridded iron-on stabilizer.
Each square is 2 inches, and the pieces were cut to a scant 2 inches, and then laid out in the center of each square. Then I used a dry iron to fuse them to the stabilizer.
When the pieces for the boots were finished, I started on the red Santa suit.
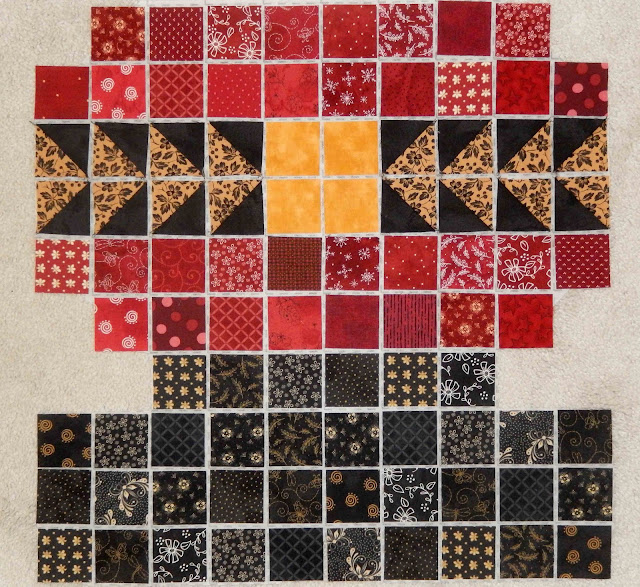
The body and hat of the Santa were made separately. When I had all the pieces fused for the body, it looked like this:
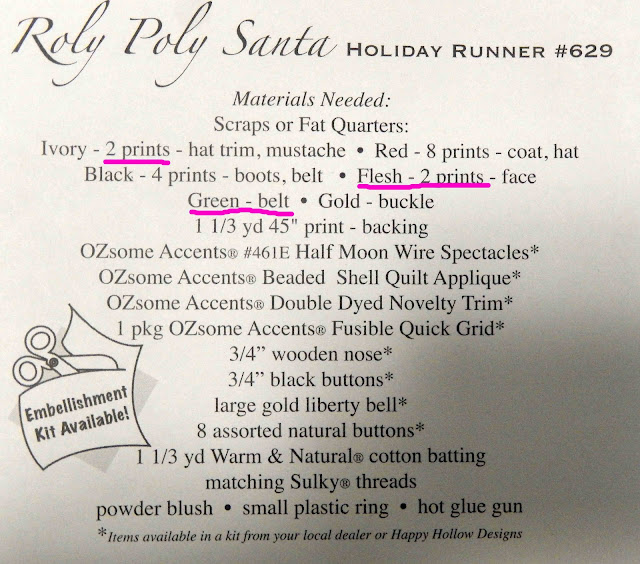
Ordinarily, I won't purchase a kit. In my experience, items are often missing, and so they frustrate me. This pattern worked out just fine, but there were a few things missing. You can see the "materials needed" listed here. There were no prints that would qualify as "ivory" the way I understand it, and there was only one "flesh" print. As for the green for the belt, there was none at all. When I looked at the pattern picture, I couldn't even see where green was supposed to go, and so I just selected the fabrics that seemed most like the picture, and it all worked out.
Once I had the body of the Santa finished, it was time to work on the face and hat. The face and hat trim started at the bottom of the piece.
Then, I was ready to put in the red fabric for the hat.
Now, watch how slick this is. Once you have all the fabric fused down, you simply fold the stabilizer on the grid lines and stitch using a quarter-inch seam allowance. First, stitch the vertical seams,
When that's all finished, it will look like this from the back.
Next, you stitch the horizontal seams, but first, you clip the seam allowances to the stitching so that you can fold on the grid lines. This was a little confusing when I read the instructions, but once I started doing it, the objective became obvious.
When both vertical and horizontal seams are sewn, it will look like this on the back.
From the front, it looks like this.
My one complaint about this is that it made it pretty much impossible to get perfect points on my flying geese, but for this project, it doesn't really matter.
When the body was done, I did the same thing with the hat.
And then it was time to (gulp) cut the hat to the right shape.
And there it is. The instructions were very clear on this part.
Then, you sew the hat to the body and you have your little patchwork Santa top.
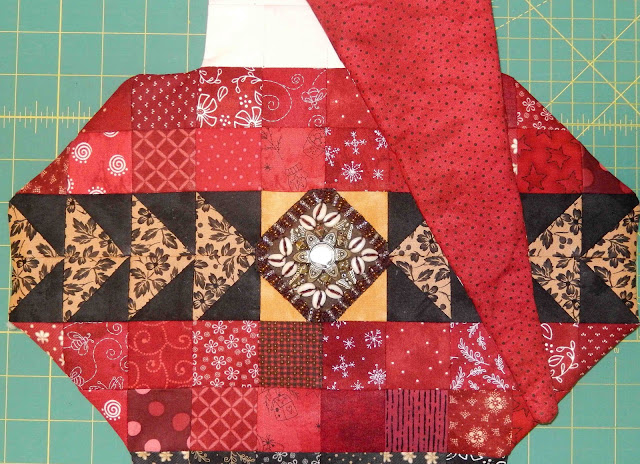
The next step was to place the belt "buckle". The instructions told me to use a decorative stitch (like a blanket stitch) on my sewing machine to stitch this to the top.
I wouldn't have thought this possible if I hadn't done it myself, but the sewing machine stitched the buckle to the fabric slicker than hot snot on a door knob. (I'll bet you haven't heard that before.) I just had to be careful not to hit the little beads with the needle, which meant sewing very slowly.
Then the top and bottom were laid right sides together, and both were laid on top of the batting. I simply stitched around the body of the Santa, trimmed the seam allowances and the corners,
And then turned the whole thing inside out. There was an opening at the bottom of the boot for turning, and that part was hand stitched closed.
There's the backing fabric.
Next, I was instructed to quilt as desired. You could get away with not quilting this, I think, but I quilted mine.
I quilted a diagonal grid for the boots and the pants,
then stitched in the ditch above and below the belt, the face, and the hat trim,
then stippled the hat.
When I left this yesterday, I had the embellishments laid in place, but not attached.
This morning I had an appointment for a pedicure and had some grocery shopping to do. When I got home, I finished him off. The glasses are hand-sewn, but the rest is done with a hot glue gun...a technique I've only done once before, so that was the second "gulp" of the project.
And there he is, hanging on the wall in my living room. He's all ready for Christmas. His eyes are a little beady, I'd say. He might be as creepy as the elf on a shelf. What do you think?
Just now I tried to link to this project on the Bird Brain Designs website, but it looks as if they're sold out now. Nevertheless, if you like this guy, there is a snowman available that uses the same technique. You can find him right here.
The Doors of Ireland quilt is looking rather sad and forlorn after its lengthy stint in time out. I'll let it out of the doghouse tomorrow. Today my TOWA tension gauge was delivered, and so I'm hoping the Doors and I will be able to get along a little better. I'll get to work on that tomorrow.


7 comments:
Thanks so much for the blow-by-blow of making the Santa. Looks like a lot of fun and yours turned out great. We have yet to haul out the boxes of Christmas decorations. Don't know why I have an aversion to boxes this year - ha!
Oh he's cute, no where near as creepy as the elf on the shelf :). Debbie (Stitchin Therapy) uses that grid method to make her watercolor quilts, I've yet to try it but it looks like it would save a lot of hair pulling and time.
He is quite the cute charmer! Great job on this and a good tutorial on using the interfacing. Like Dana said, I use it all the time. I love the perfect seams, excluding the triangle points. Like you said they aren't always perfect...close but not always on the mark. super job.
Hot snot on a door knob....OMG....I am laughing too hard! Thanks for the morning smile!
Growing up I lived for awhile in a small town in Illinois. You could call the local police department to get updated road conditions in the winter (pre-cell phone and Internet days). One morning the dispatcher told my mother that the roads were slipperier than snot on a porcelain doorknob. We have never forgotten that!
I have never used this (yes, Deb does) - it seems like more work and more bulk when playing with small pieces. Love your terminology!
Fun project! Thanks for showing that stabiliser; I'd never seen it before, but it looks like a useful aid if you are using very small squares.
Post a Comment