If you're like me and you're pie crust phobic, you're not alone. Russ Parsons, in his food science book,
How to Read a French Fry
aptly pointed out that
"it is precisely because we make pie crusts so rarely that they have the power to inspire dread disproportionate to their actual difficulty. A pie crust ain't nothin' but flour, fat and water, right? That, of course, is disingenuous. It is because the ingredients are so basic that pie crusts are so difficult. They are almost totally dependent on technique, and technique is not something that you can pick up on a quick trip to the grocery store. The only way to learn how to make a good pie crust is to make enough bad ones that you finally acquire both an understanding and a feel for how a good one is made."
I've made plenty of bad ones myself. In fact, I doubt any of my pie crusts have been truly good ones. But this is what I've learned in that process: pie crust is very forgiving. Because it's made up mostly of fat, any errors you make kind of melt away in the baking process. I'm going to show you what I mean because I'm about to walk you through my latest crust-making adventure, and I'll show you how imperfect my crust is. When I'm finished, I think you'll see that all of my imperfection doesn't matter in the least because my crust, like my cutting mat, is self-healing. So here goes:
I'm using the recipe from my favorite baking cookbook,
Baking Illustrated, by Cook's Illustrated.
For a lattice-top pie crust, you'll need 3 cups (15 oz.) of unbleached all-purpose flour, plus more for liberally dusting your work surface. I like to weigh my dry ingredients because, where flour is concerned, you can get different amounts depending on how you measure it out.
To that you'll want to add 1 teaspoon of salt and 2 tablespoons of sugar.
Now for the fat: you'll need 7 tablespoons of shortening and 10 tablespoons of butter. I've taken to making my pie crusts in my food processor. I could never get it right with one of those pastry cutters.
Just pulse it about ten, one-second pulses until the pieces of fat are about the size of peas. Then, depending on how warm and dry the weather, you'll want to add between 8-10 tablespoons of ice water and pulse again until your dough comes together so that it clumps when you squeeze it in the palm of your hand . . . kind of like play dough.
Now you're ready to form your dough into disks. I have a solid-surface counter top, and so I roll it out there, but I can highly recommend the
Roul-Pat baking mat if you have a tile or other porous surface.
The most important thing I've learned about making piecrust is to use
plenty of flour on your hands, on your rolling pin, on your rolling surface and on the dough itself. Better to use too much flour than to have the dough stick to anything and everything it comes into contact with. In fact, I've been known to dump several pounds of flour into my bathtub and roll around in it before trying this. Not really. It only looks like I have.
So for this lattice top piecrust, you'll want to pat the crust out into two pieces: one will be about a four-inch disk, the other about a five-inch square. You'll use the square for the lattice top in a little while.
Once you have it formed into these two pieces, wrap it in plastic and refrigerate it for at least one hour . . . longer if it needs it. You want it to be firm before you try rolling it out.
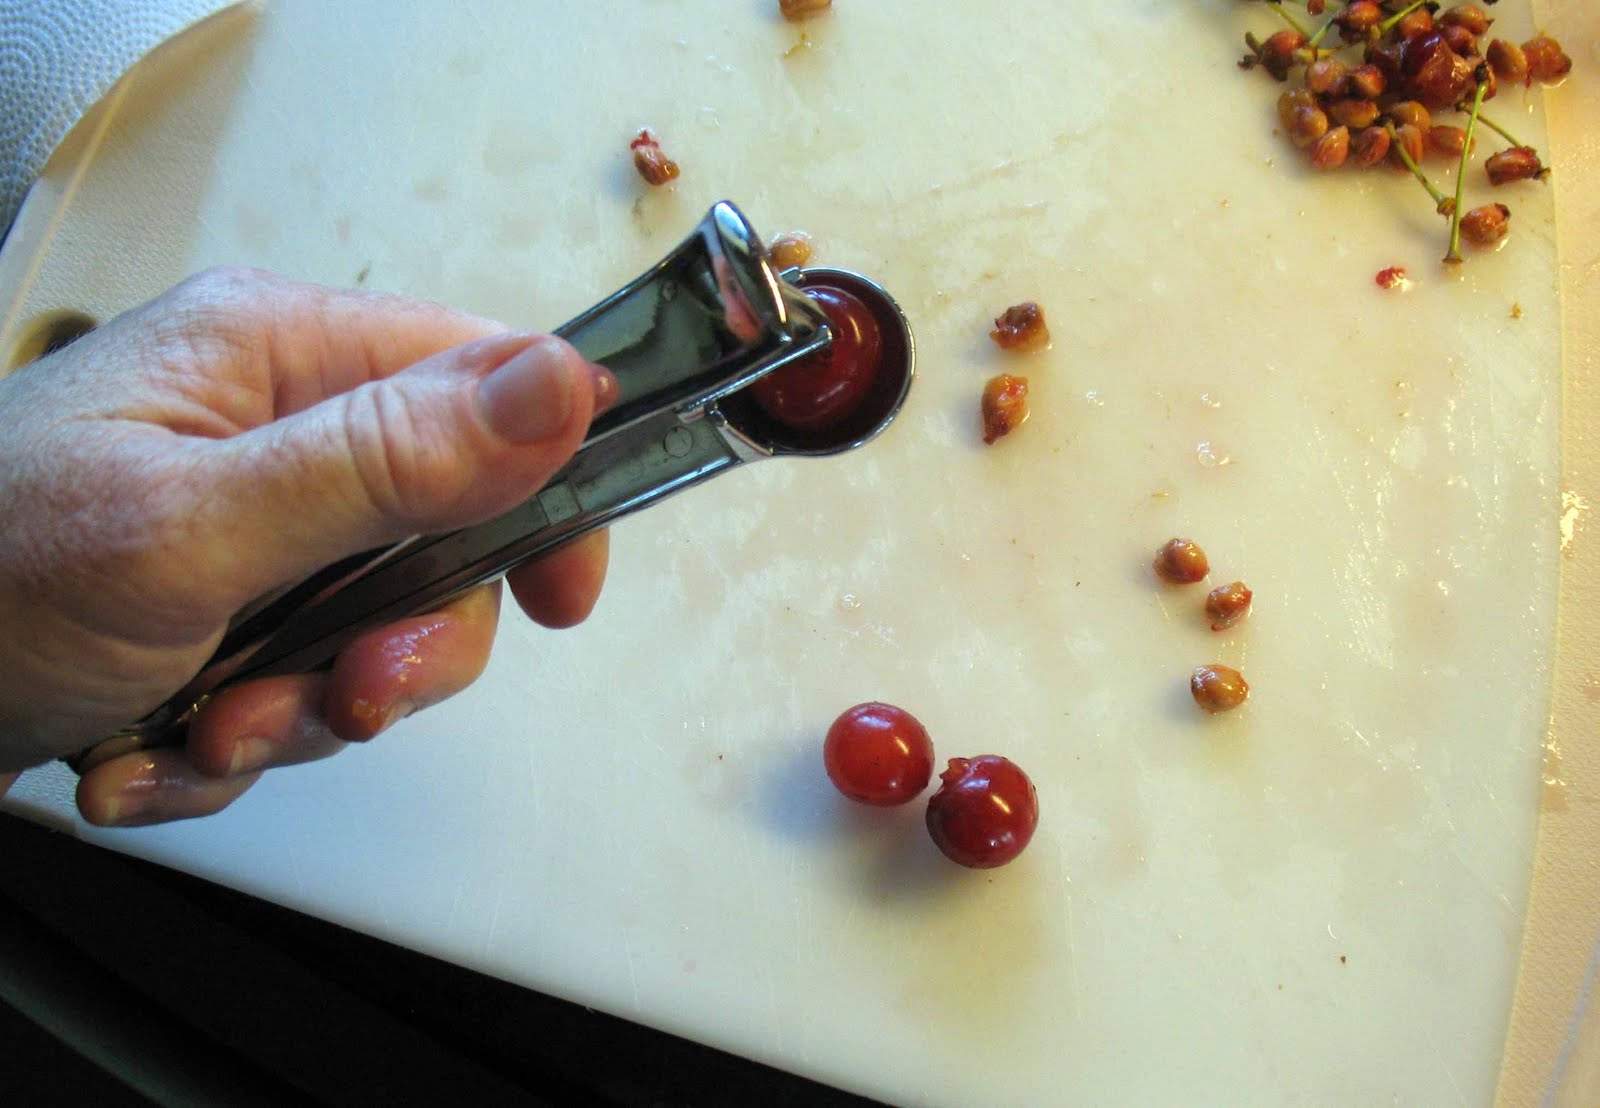
While you're waiting for that to chill, you can start pitting your cherries.
Not a glutton for punishment, you say? You can use canned, pitted ones too. You'll need about six cups of cherries whichever way you decide to go. By the time your cherries are pitted, you can probably go back to working with your pie dough.
Making sure you liberally flour your work surface again, roll the round piece out into a circle abut 12 inches in diameter.
The easiest way to get it into your pie plate is to roll it up over your rolling pin . . . really, it won't hurt it, and it won't stick together.
(In case you haven't noticed, making piecrust is a messy business.)
When you have it rolled up on your rolling pin, just start at the edge of your pie plate and unroll it again.
It'll be sort of draped over your pie plate. You'll want to gently lift it to fit it into the corners, rather than pressing it in. Try not to stretch it.
Don't worry if it develops little holes or cracks. Just pull a little dough from the extra around the edge and press it into place as a patch. No one will ever know, I promise.
When that's done, put the pie plate back into the refrigerator, as is. You'll trim it later.
Next, remove the remaining square piece of dough from the refrigerator. Liberally flour your surface again, and roll it into a rectangle about 15 x 11 inches. Move it to a baking sheet lined with parchment paper by rolling it up on your rolling pin just as you did with the earlier piece.
Then, you'll want to use a fluted pizza cutter (or use your rotary cutter fitted with a pinking blade--Ha!) to cut it length-wise into eight 1 1/2-inch wide strips (it doesn't need to be exact, nor does it need to be perfectly even).
Then put the whole thing back in the refrigerator to chill again while you preheat your oven and finish up your fruit filling. In case you're not getting this, the two most important things you can do to ensure your success with piecrust is to keep it well chilled and to use plenty of flour to keep things from sticking.
Okay, now for the filling, you already have your cherries. In a large bowl, you'll want to add 1/4 cup of cornstarch, 1 1/4 cups of sugar (adjust the sugar according to how tart your cherries are and to your personal taste preference), 1/4 teaspoon of cinnamon, and a pinch of salt.
Whisk that together, and then dump in your six cups of pitted cherries along with 1/4 teaspoon of almond extract. Fold it together until all the dry ingredients are moistened.
Then remove your chilled pie plate with crust from the refrigerator and dump in the fruit.
Now comes the fun part. Really, it's not difficult to do. In fact, I think this is easier than doing a solid top crust.
Here's what you do: Remove your baking sheet with the dough strips from the refrigerator. If they are too stiff, allow them to cool for a few minutes until they are pliable, but not too soft. If they get too soft, just chill them again for a few minutes, then start again.
There are lots of ways to do this, but this is the way that works best for me. First, lay four strips horizontally across the pie. They do not need to fit perfectly, just make sure they're longer than the pie is wide. Then, fold back the first and third strip from left to right and lay one strip vertically just to the right of center.
Don't worry if they crack or break, as mine have here. You'll be able to press them back together as you go. Really, you'll see what I mean in a minute.
When that's done, re-fold strips one and three back across the pie and fold back strips two and four just the same way. Then lay another vertical strip just to the left of center.
Then refold strips two and four back across the pie. Now you're read to add the final two strips. I like doing it this way: Fold strips one and three in the opposite direction and place your vertical strip down the right side of the pie.
Re-fold them as before and do the same thing on the left side of the pie by folding back strips two and four.
Re-fold them to the edge of the pie, and voila! You have a lattice top pie crust. Not so bad, huh?
And just to show you that I'm not the queen of pie crusts, a couple of my strips broke. I just pressed them back together like playdough. When they bake in the oven, they will melt together, and no one will be the wiser.
Now you're ready to gently press the edges of the strips into the bottom crust, flute it if you wish, but I never bother with that. I'm going to flavor, not beauty. Finally, gently brush the top crust with water and sprinkle it with Demerera sugar. Now you're ready to bake your pie.
You'll want to preheat your oven along with a rimmed baking sheet to 500°F. (My apologies to those of you suffering in the hot weather. My personal belief is that pie is worth the sacrifice.) When the oven is hot, place the pie on the rimmed baking sheet (be sure it's a rimmed baking sheet unless you like cleaning your oven) and reduce your oven temperature to 425°F. Bake it for 25-30 minutes until the crust is set and beginning to brown.
Then, rotate the pie and reduce the temperature to 375°F and bake for another 25-30 minutes or until the filling is bubbly and the crust is deep golden brown. Then remove it from the oven and place it on a wire rack to cool for 2 hours. If you look carefully, you can see that one of my strips broke while it was baking. I doubt that will keep anyone from eating it. What do you think?
Then . . . what else? Enjoy! I like mine with vanilla ice cream!